⚙️ Settings for Accounting
Before you can start exchanging data between FL3XX and your app, you need to set up FL3XX for external accounting.
Integrations Settings
Admin system access is required to enter the FL3XX integration settings.
- Click your name in the top right corner of the screen
- Select Settings
- Go to Integrations
- Open External Accounting to reveal its settings

There are two options there:
- Enable "Ready to Invoice" Button in Invoice Dialogue
- Set "Ready to Invoice" on Confirmation
"Ready to Invoice"
You can understand "Ready to Invoice" as a flag, which is set for a booking, when it's time to expose it to finance. Operators may receive thousands of quote requests and process hundreds of quotes irrelevant for finance, since they are never confirmed. Only relevant business cases can be then flagged as "ready to invoice". Then, your app can fetch these bookings and process according to your workflow.
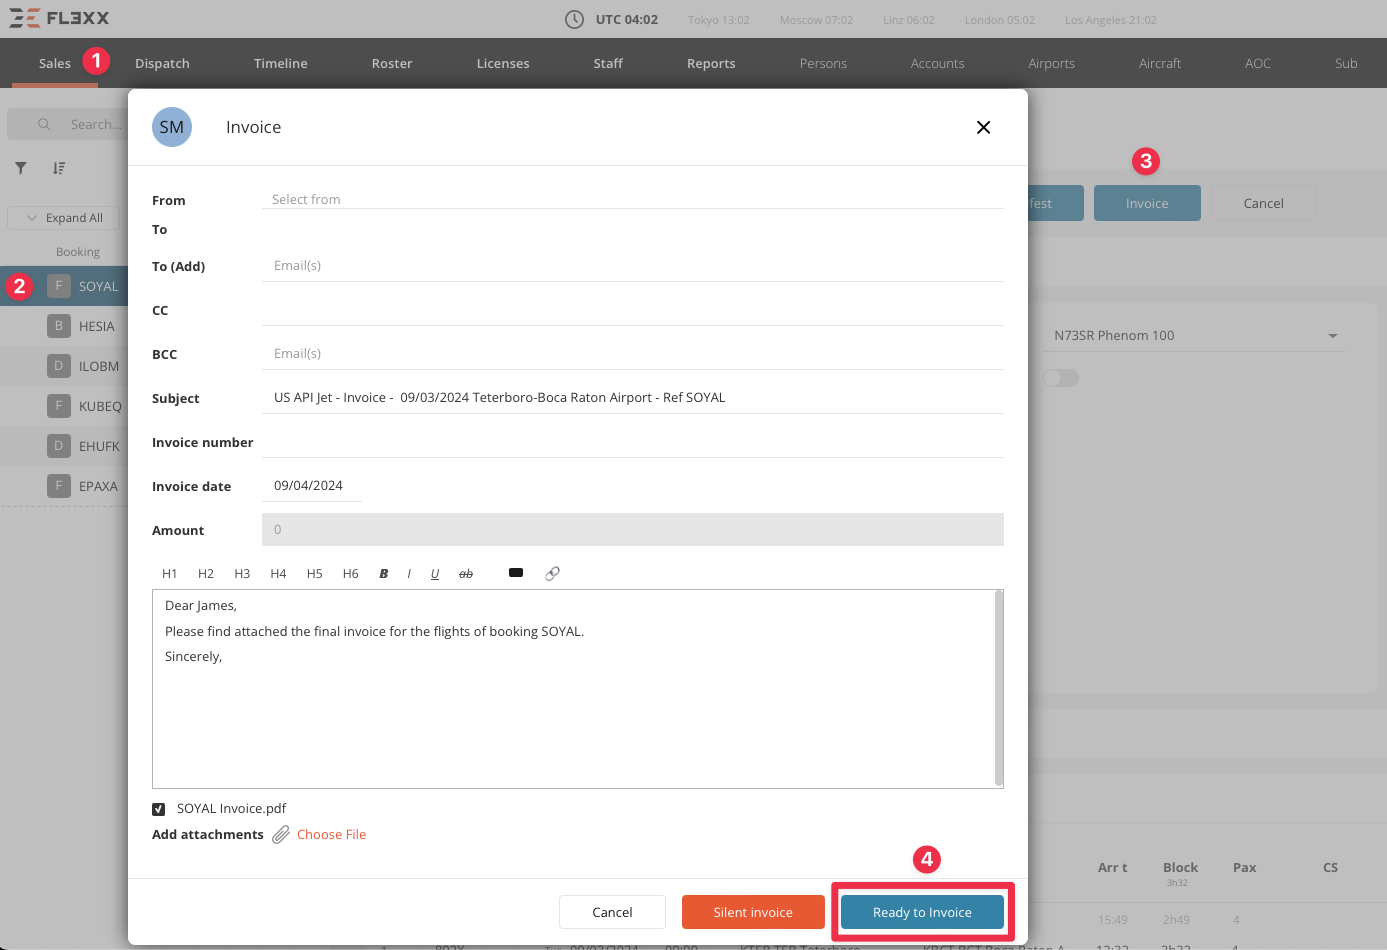
Ready to Invoice Button in the Invoice Dialog (manual)
The manual workflow to flag a booking for accounting looks like this:
- In the Sales module
- Open a desired booking
- Press the "Invoice" button to open the dialog window
- Press the "Ready to Invoice" button to flag the booking

Next, when your accounting app fetches data from FL3XX, this booking will be included and transferred.
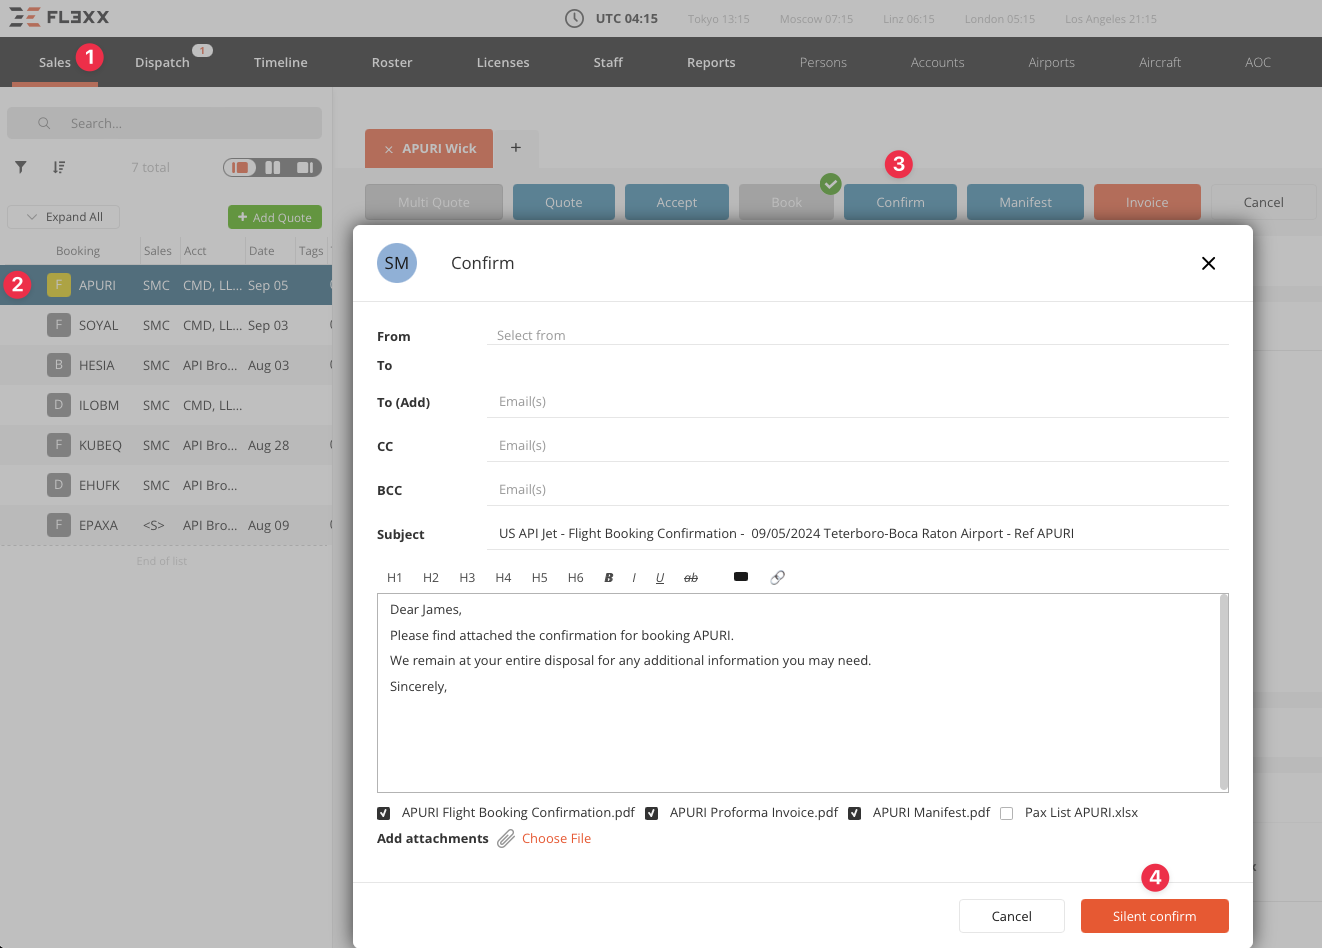
Ready to Invoice on Confirmation (automatic)
Another way is to let FL3XX flag each booking as subject to accounting upon confirmation:
- In the Sales module
- For a selected booking, proceed to the step "Confirm"
- Press the "Confirm" button to open the dialog window
- Confirm the booking by pressing the button "Confirm" (or Silent Confirm) in the bottom right corner.

Upon this action, FL3XX automatically flags this booking as "Ready to Invoice". Next, when your accounting app fetches data from FL3XX, this booking will be included and transferred.
Updated about 2 months ago
